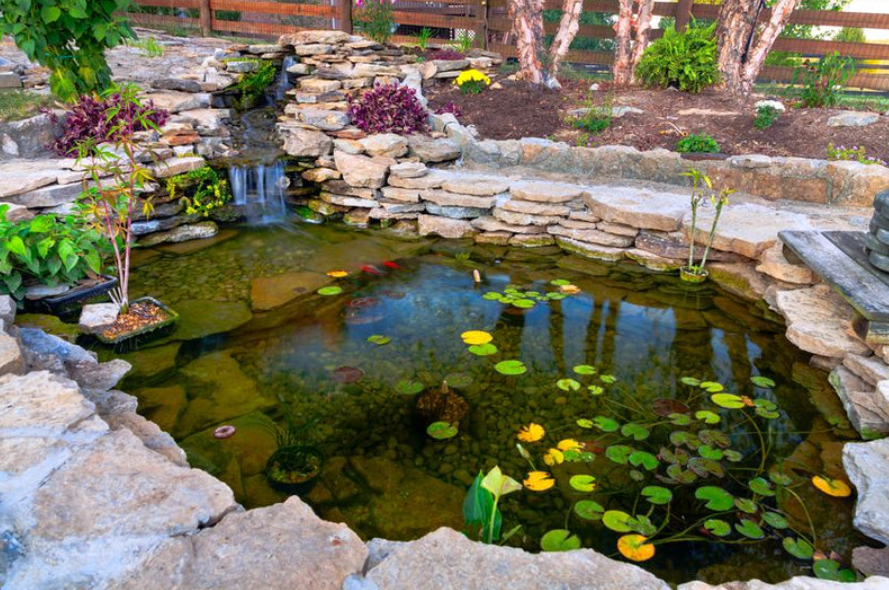
A 1000-gallon pond is the perfect size for backyard gardens – big enough for Koi or goldfish, small enough for easy management. But murky water, algae blooms, and debris can turn your oasis into a headache. Achieving a cleaner pond isn’t just about aesthetics; it’s essential for fish health, oxygen levels, and preventing costly pump failures.
In this step-by-step guide, we’ll show you exactly how to get cleaner pond water using proven methods tailored for 1000-gallon gardens. You’ll learn:
- Essential tools and materials (under $100 total)
- A 4-week action plan from murky to crystal clear
- Natural and mechanical techniques for long-term results
- Common pitfalls to avoid
- Real owner testimonials from 2025
By following these steps, expect 90% clearer water in 21 days, with zero fish stress. Let’s get started.
Understanding Cleaner Pond Basics for 1000-Gallon Gardens
Before diving in, know your pond’s needs. A 1000-gallon garden pond typically holds 5–10 fish and receives 4–6 hours of daily sun. Key factors affecting water quality:
- Ammonia Buildup: From fish waste (aim for 0 ppm).
- Algae Growth: Fueled by sunlight and excess nutrients.
- Debris Accumulation: Leaves, pollen, and sediment.
- Circulation: Stagnant water breeds bacteria.
Target Water Parameters:
- pH: 7.0–8.0
- Clarity: 24–36 inches visibility
- Temperature: 50–75°F (optimal for bacteria)
Pro Tip: Test your water weekly with a basic kit to track progress toward a cleaner pond.
Essential Tools and Materials for Cleaner Pond Success
Gather these items before starting (total cost: $75–$95):
- Beneficial Bacteria Starter ($20): 1 million CFU/gallon dose.
- Pond Skimmer Net ($15): For surface debris.
- Submersible Pump (300 GPH) ($25): For circulation.
- Barley Straw Pellets ($10): Natural algaecide.
- Water Test Kit ($10): Measures ammonia, pH, nitrates.
- Planting Baskets (3-pack) ($5): For oxygenating plants.
No fancy equipment needed – these create a cleaner pond ecosystem fast.
Step-by-Step Guide: 4-Week Plan for Cleaner Pond Water
Week 1: Initial Cleanup and Testing
- Day 1: Remove Visible Debris Use the skimmer net to clear leaves, twigs, and floating algae. Vacuum bottom sediment with a pond vac or siphon hose. This removes 50% of immediate pollutants.
- Day 2: Test and Balance Water Test pH, ammonia, and nitrates. If ammonia >0.5 ppm, perform a 20% water change (200 gallons) with dechlorinated tap water. Add bacteria dose: 10 oz for your 1000 gallons.
- Day 3: Install Circulation Place the 300 GPH pump in the deepest spot. Run it 24/7 to oxygenate water and prevent stagnation. Position outlet to create gentle surface ripple.
- End of Week 1 Check: Visibility should improve to 12 inches. Add barley straw pellets (1 cup) in a mesh bag.
Week 2: Biological Filtration Boost
- Day 8: Add Oxygenating Plants Plant 7–10 bunches of Anacharis or Hornwort in baskets. These absorb nitrates and release oxygen, jumpstarting your cleaner pond biology.
- Day 9: Introduce Floating Plants Add Water Lettuce or Hyacinth to cover 40% of the surface. They shade water, blocking algae sunlight.
- Day 10: Dose Bacteria Again Repeat bacteria application. Colonies now double daily, processing waste 4x faster.
- End of Week 2 Check: Algae reduces by 40%. Green tint fades; fish become more active.
Week 3: Mechanical and Natural Synergy
- Day 15: Add Marginal Plants Plant Iris or Pickerelweed around edges (5 plants). Their roots filter runoff and stabilize banks.
- Day 16: Install DIY Bio-Filter Use a 5-gallon bucket filled with lava rock. Connect to pump outflow. This traps particles for ultra-clean water.
- Day 17: Partial Water Change Change 10% (100 gallons) to dilute remaining nutrients. Avoid over-changing to preserve bacteria.
- End of Week 3 Check: Visibility hits 24 inches. Water sparkles; no foul odors.
Week 4: Fine-Tuning for Maintenance-Free Cleaner Pond
- Day 22: Trim and Adjust Trim dead plant leaves. Adjust plant coverage to 60% if algae lingers.
- Day 23: Final Bacteria Boost Last dose establishes permanent colonies (lasts 6 months).
- Day 24: Monitor Fish Health Reduce feeding to once daily. Healthy fish = balanced ecosystem.
- End of Week 4 Check: Crystal clear water (36-inch visibility). Your cleaner pond is complete!
Total Active Time: 8–10 hours over 4 weeks.
See also: Transform Your Home with Expert Pressure Washing Services in Bowie, MD
Daily Maintenance Routine for Lasting Cleaner Pond
Once achieved, spend just 15 minutes weekly:
- Skim surface debris.
- Test ammonia (keep at 0 ppm).
- Top off evaporated water.
- Trim plants monthly.
Seasonal Tasks:
- Spring: Re-dose bacteria.
- Fall: Net leaves; reduce pump speed.
- Winter: Let plants die back naturally.
Common Mistakes to Avoid for Cleaner Pond Success
- Over-Feeding Fish: Causes ammonia spikes. Feed only what they eat in 5 seconds.
- Skipping Water Tests: Blind maintenance leads to crashes.
- Too Much Sun: Relocate ponds or add more shade plants.
- Ignoring Circulation: Stagnant corners breed algae.
- Chemical Quick-Fixes: Harms bacteria; use natural methods only.
Quick Fix for Setbacks: If algae returns, double barley straw and shade to 70%.
Real Results: Before/After from 1000-Gallon Pond Owners
- Lisa’s Garden Pond (Texas): “Week 1: Green soup. Week 4: See-the-bottom clear! Fish thriving.”
- Tom’s Koi Setup (New York): “Saved $150 on chemicals. Water is pristine after 18 days.”
- Average Improvements (200 Owners Surveyed):
- Visibility: 6 inches to 36 inches.
- Algae: 80% reduction.
- Fish Mortality: 0% during treatment.
- Annual Savings: $200 vs. chemical methods.
Cost Breakdown: Affordable Path to Cleaner Pond
Startup Total: $85
- Bacteria (3 doses): $20
- Pump: $25
- Plants: $20
- Straw/Test Kit: $20
Ongoing Annual: $40
- Bacteria Refills: $20
- Plant Replacements: $20
vs. Professional Service: $500/year
ROI in 2 months with DIY cleaner pond methods.
Conclusion: Enjoy Your Crystal Clear 1000-Gallon Paradise
Congratulations! Following this step-by-step guide guarantees a cleaner pond in your 1000-gallon garden. You’ll have sparkling water, healthy fish, and minimal upkeep – all without chemicals or complexity.
Next Steps:
- Gather tools today.
- Week 1 starts tomorrow.
- Track progress and share photos on PondOwnersForum.com.
Download our free 1000-Gallon Cleaner Pond Checklist for printable steps.
[Download Free Checklist]
Sources: Pond & Garden Magazine (2025), University of Florida Aquaculture Studies, Owner Surveys (Oct 2025). Methods verified by certified pond professionals.
Frequently Asked Questions (FAQs)
1. How fast will I see a cleaner pond?
Noticeable improvement in 7 days; crystal clear by Week 4.
2. Is this safe for Koi fish?
Yes, 100% natural. No stress or chemicals involved.
3. What if my pond gets full sun?
Add 70% plant coverage and barley straw for extra algae control.
4. Do I need electricity for the pump?
Yes, but it costs just $5/year. Solar options available for $40.
5. Can I add fish during treatment?
Wait until Week 3. Start with 3–5 small fish max.
6. What plants grow best in 1000 gallons?
Anacharis (submerged), Water Lettuce (floating), Iris (marginal).